
Get started with Keap Automations

Automating repetitive tasks using Keap can be as simple as “when this happens then do that”, or a more advanced “when this happens and if that occurs, then do that” workflow.

Keap Automations are started by “when” conditions being fulfilled. We typically call these a “trigger”.

You can choose one of the following to trigger your automation:

  • A tag is added to a contact
  • A public form, internal form or landing page form receives a submission
  • A product is purchased (either a specific product or any product)
  • An invoice is sent
  • An invoice is paid
  • Deal enters stage
  • Deal exits stage
  • A new appointment is scheduled
  • An appointment is cancelled

You can then configure one or multiple events (or processes) to happen. You can choose any of the following events:

  • Send an email to the contact
  • Send a notification to one user, or more, in your team
  • Create a deal
  • Add a tag to the contact
  • Remove a tag from the contact
  • Create a task assigned to a user in your team

Consider this example.

  1. A contact requests information about a horse you are selling
  2. You apply a specific tag to the contact record in Keap (or we can automate that if the enquiry is received via a website form).
  3. You configure an automation in Keap to immediately send an email to the contact and include information about the horse, pricing, a video, some images – or anything else to help you meet the needs of your prospective customer.

Consider this second example.

  1. A contact completes a form on a Keap Landing Page to RSVP to an event.
  2. You configure an automation in Keap to immediately send an email to the contact including information about the event, when that Landing Page form is submitted.
  3. In that same automation, you configure a second automation step to check whether the contact is already a subscriber to your mailing list.
    • If the contact is a new contact, you configure an email to be sent the next day welcoming them to your mailing list and requesting them to set their email preferences via a web form.
    • If the contact is not a new contact, proceed to the next step.
  4. You configure a final automation step to wait until 2 days prior to the event and then email a reminder to the contact about the upcoming event.

There are two types of Automations in Keap:

  • Easy Automations
  • Advanced Automations

For each automation you wish to configure, you can choose either Easy or Advanced. Although there are a few considerations, your decision will mostly depend on your answer to the following questions:

  • Do you wish to configure an automated email using Keap’s email builder rather than a simple text email? This would include formatting rows, columns and/or background, and use of blocks for images, videos, buttons etc.
  • Do you wish to configure multiple steps and pathways in the automation, where a contact’s behaviour (e.g. filling out a web form) determines the pathway to follow?
  • Do you wish to include decision criteria to decide which step(s) to perform?
  • Do you wish to set a contact field to a specific value?
  • Do you wish to apply a Note to the contact record?
  • Do you wish to trigger an automation based on a Lead Score achieved by the contact, or a Task being completed by a user in your team?
  • Do you wish to automatically add a contact into another automation separate from the one running?

If you answer YES to any of these questions, use Advanced Automations.

If you answer NO to all of these questions, use Easy Automations.

Intro to Keap’s Easy Automations

Recommended Help Articles

Easy Automations

Into to Keap’s Advanced Automations

Recommended Help Articles

List of Available Advanced Automation Triggers & Goals


Interested in more 1:1 training? Subscribers to our CRM Premium Support service can schedule additional training and configuration support via online meetings.

Book a time to meet here.

Publish your Keap Landing Pages to your domain

Keap Landing Page URLs take the format https://keap.page/XX999/landingpagename. 

When your existing contacts click on a link to that landing page, they may consider the URL that appears in their browser window as untrustworthy and immediately exit.

When sharing those URLs on social media, they:

  • consume characters in X (twitter); and
  • look ugly

All of this leads to reduced trust and fewer clicks and/or form submissions.

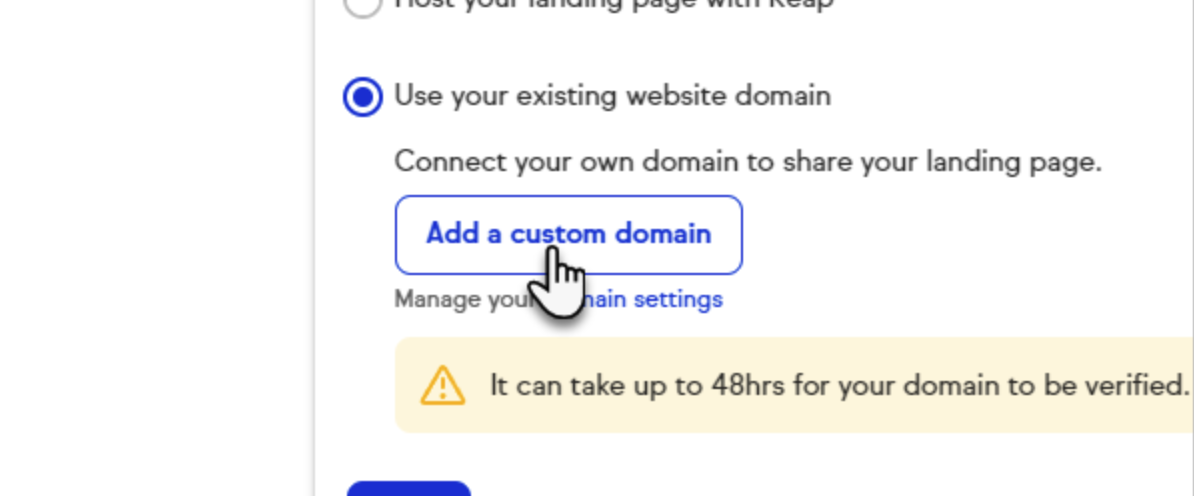
To build trust with your audience, publish your Keap landing page URLs to a ‘sub-domain’ on your own domain.

Your Keap Landing Page URL will be https://subdomain.yourdomain/landingpagename.

The subdomain can be whatever you wish. Perhaps info.yourdomain.com.au or pages.yourdomain.com.au.

Let us know if you would like to do this for your Keap account. There is one simple record to add to your domain settings.

Ask subscribers to whitelist / allowlist you

This article shares step-by-step instructions for your contacts to whitelist your sender email address, in the most common email clients and providers.

Technical Level: 2 out of 5
Read time: 5 mins
Who should read this?: Any Keap user responsible for optimising Keap mailing list quality, and in particular IT members / sub-contractors.

There are many factors that impact the deliverability and inbox placement of your emails. Sadly there is no quick fix. However, one of the proven methods to maximise the chance of your emails landing in the inboxes of your mailing list subscribers, is for them to add your email address to their list of contacts and ‘safe senders’ list.

Yes, it’s unlikely all of your email subscribers do this, but it greatly helps if they do.

We recommend each of your contacts perform their own search on how to add safe senders on their email client/email host service. However, the below can provide a guide for them.

Apple iPhone / iPad

  1. Open the email.
  2. Tap the sender’s name in the From line.
  3. On the next screen, tap Create New Contact.
  4. Tap Done.

Microsoft Outlook 2013

  1. Right-click on the email that you would like to add to your safe sender list
  2. Hover over Junk and then click the option Never Block Sender.

Microsoft Outlook Express

  1. In Outlook, go to the Tools menu.
  2. Click “Address Book”.
  3. Click New > New Contact from the drop-down menu.
  4. Type in email address and include any details you want.
  5. Click OK.

Android

  1. Tap to open the email.
  2. Tap the icon next to the email address.
  3. Tap OK.

Apple Mail

  1. Right-click on the sender’s email address.
  2. Select Add to Contacts or Add to VIPs.

Gmail

  1. Click and drag the email into the Primary tab. Or find an email in the spam folder and mark as Not Spam
  2. Click Yes to confirm

Outlook.com / Hotmail

  1. Open the email.
  2. Click the Add to contacts link

Yahoo! Mail

  1. Right-click the email.
  2. Select Add Sender to Contacts.
  3. Click Save.

Bigpond

  1. Login to Bigpond mail in your browser
  2. On the left, right under SETTINGS, click on “Mail” and then click on “Safe Senders”.
  3. On the Safe Senders sub-menu, please write @<yourdomain> in the blank square next to Add email address, and click on the (+) Add button.